962 Election — Complete Guide
A complete walkthrough of the Expat Tax Tools 962 Election Assistant — from navigating data tables and adding a client, through recording investments, to generating the final PDF statement with Forms 1118, 8992, and 8993.
Data Tables
How filtering, exporting, and sorting work across every product.
Throughout Expat Tax Tools, your records are presented in interactive data tables. The same controls appear in every product, so the handful of behaviours below will make every workflow that follows quicker to navigate.
Type into the search field above any table to filter the rows instantly — the list narrows as you type.

Above each table you’ll also find a set of actions:
- Print the data table.
- Export to Excel — download the data as a spreadsheet.
- Export to PDF — download the table as a PDF document.
- Show Deleted — reveal records that have been removed from the active view.
For tracking and auditing, data is never erased from the database. Instead it is marked as Deleted and hidden from the active view. Turn on Show Deleted to see everything, including removed records.
Tables can be sorted by a single column or by several at once. Click a column header to sort by it; click the same header again to reverse the order.
To sort by multiple columns, hold Shift and click additional headers. The first header you click is the primary sort; each subsequent Shift-click adds a secondary, then a tertiary sort within it.

In the example above, the data is sorted first by Client Code (descending), then by Name (ascending) within each code.
Clients
Create, find, and open client records — the starting point for every return.
The first screen in most products is your client list. The page is divided into a left-hand menu and a main content area.
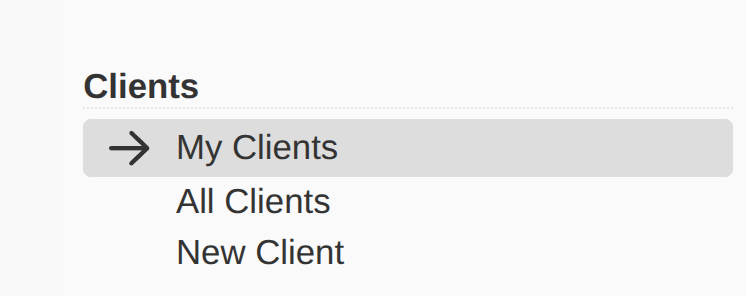
The Client section of the left menu offers three views:
- My Clients — clients associated with your user account.
- All Clients — every client on the customer account.
- New Client — create a new client record.

Click Add Client, or choose New Client from the left menu, to open the new-client form.
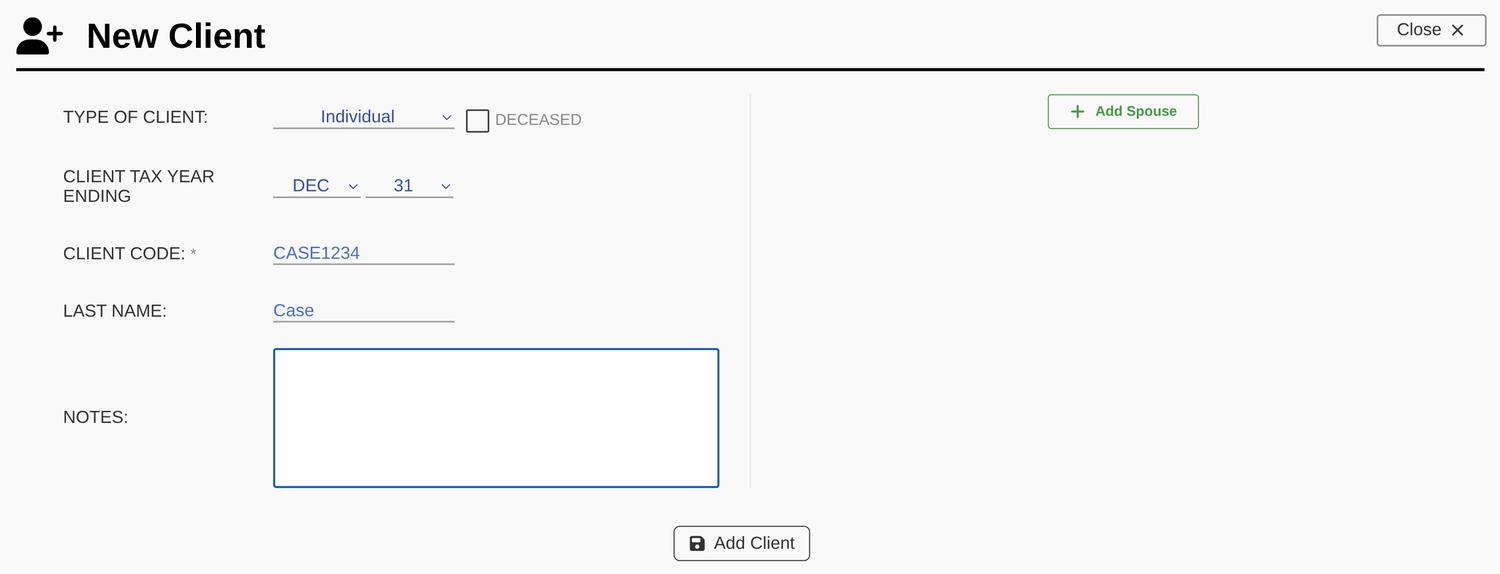
Complete the form:
- Type of client — Individual, Corporation, Partnership, S Corporation, Non-grantor trust, or Estate.
- Tax year ending — the month and day the client’s tax year ends.
- Client code — an internal code to identify the client. We recommend the first four letters of the last name plus the last four digits of the ID (SIN, SSN, EIN, etc.).
- Last name / Company name — for security, avoid entering full names.
- Notes — internal notes only; these never appear on any statement.
For individuals, click Add Spouse on this screen to create both accounts at once. When you’re done, click Save.

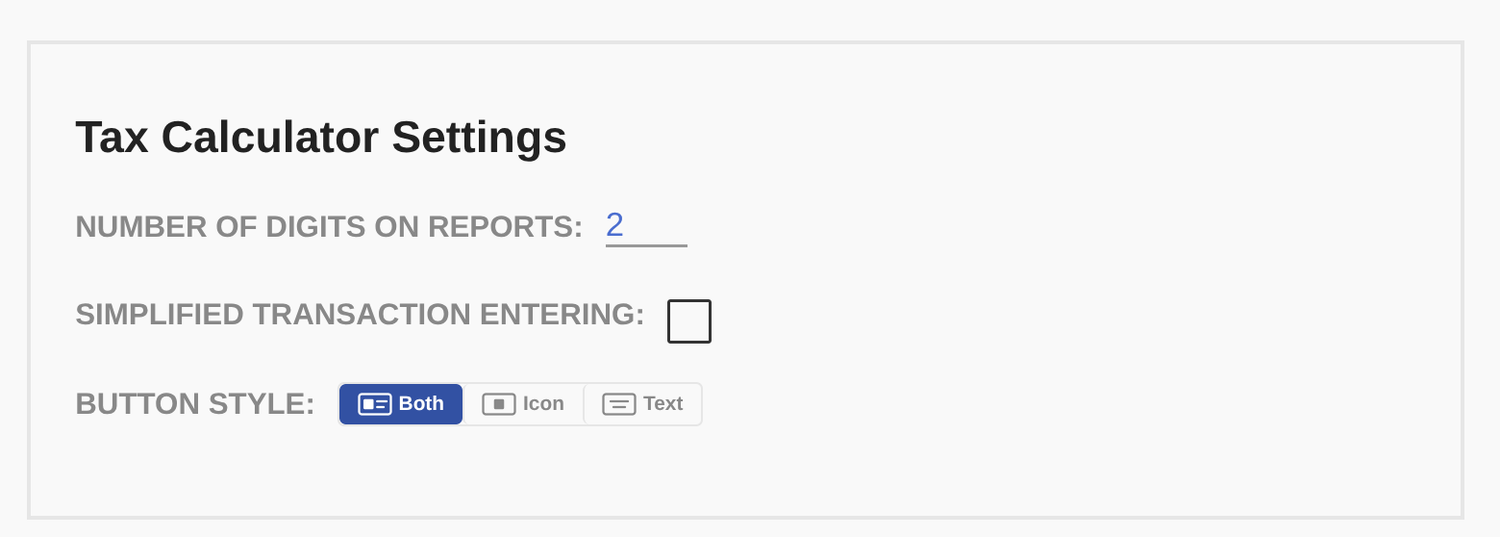
How the per-row actions appear depends on your dashboard settings. Under Tax Calculator Settings → Button Style you can choose icons only, text only, or icon and text. With icons only, an edit icon appears at the right of each row; with the other styles, the actions appear when you hover over the row.

Each client row offers three actions:
- Select — open and work on the client account.
- Edit — modify the client information.
- Delete — mark the client as deleted and remove it from the list.
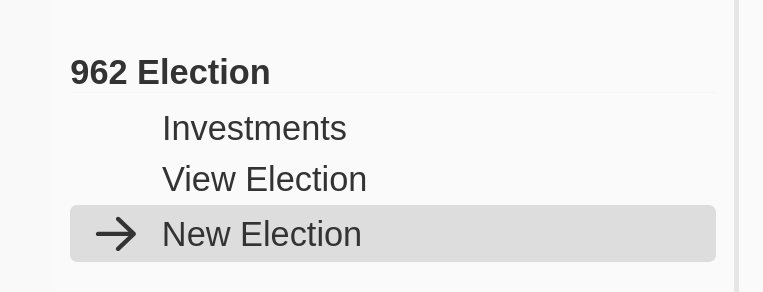
When a client account is selected, the left menu gains additional options — Edit & Transfer Client plus the options specific to the software you’re using. In the 962 Election Assistant, those are Investment, View Election, and New Election.
Tools in the Expat Tax Tools family share information. A client added in the 962 Election module is automatically available in our other tools, such as PFIC Pro and Gains Pro. The investment list is shared in the same way.
Investments
Record CFCs and other holdings once, then reuse them across the tools.
Investments are shared across the Expat Tax Tools family. Enter an investment once and reuse it in PFIC Pro, Gains Pro, and the 962 Election Assistant. The investment list is reached from the left menu of any selected client account.

Click Add Investment to open the Investment Info form. Required fields are marked with a red asterisk (*).
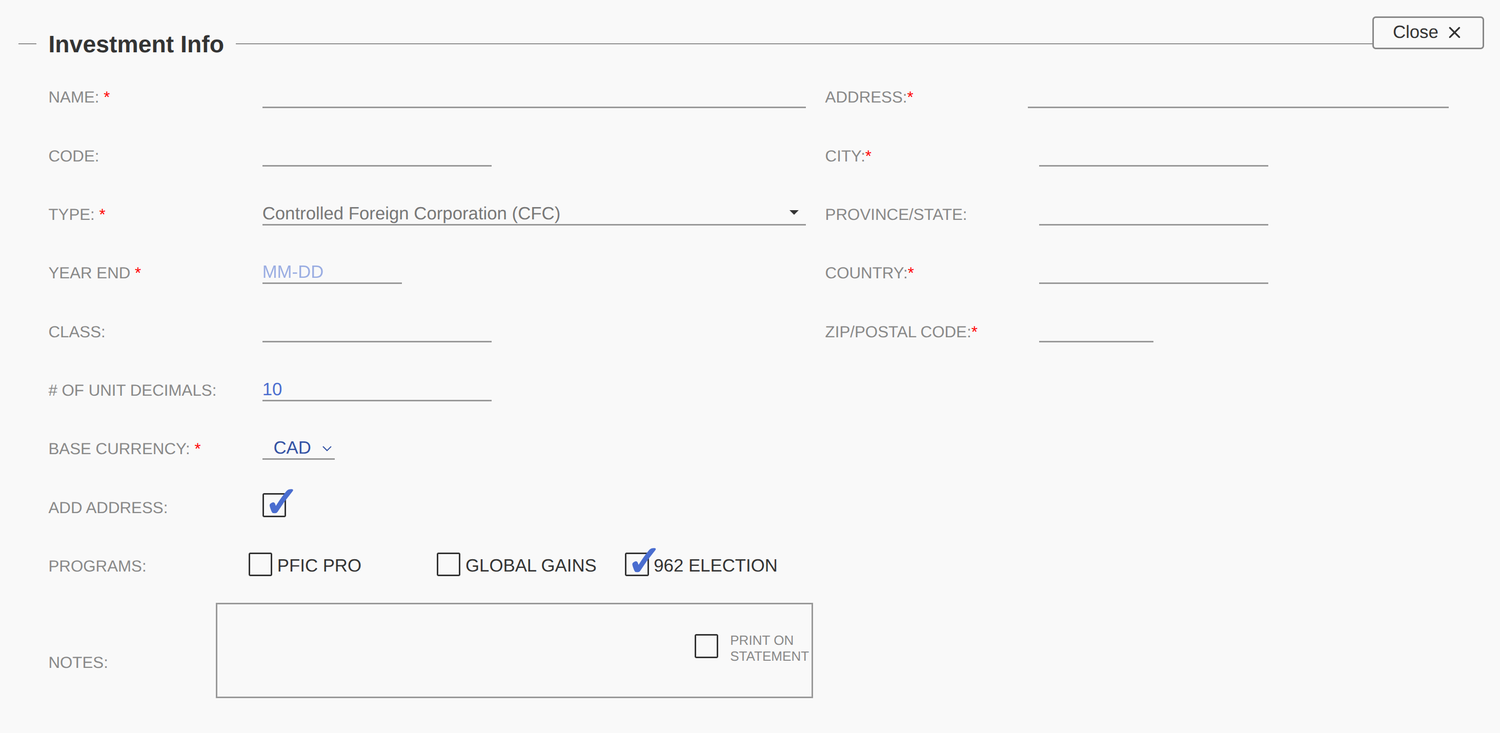
Enter the core details of the investment:
- Investment name and code.
- Investment type — Stock/Equity, Bond, Mutual Fund, Non-US corporation (not publicly traded), CFC, ETF, Cash, Real Property, Intangible, or Other.
- Year end — some investments, such as corporations, have a year end.
- Class — the class of units held, if applicable.
- # of Decimals — the number of decimal places for the units held.
- Base currency — the investment’s default currency. You can still choose other currencies when entering transactions.
- Programs — select the tools this investment should belong to (PFIC Pro, Global Gains, 962 Election). Sharing it across tools eliminates double entry.
- Notes — tick Print on statement to include a note on the final report.
- Address — some reports require the investment’s address (for example, the 962 calculator and the Form 8621 calculator). Complete every field; Province/State is optional.
Investments are held in financial accounts — enter those here. When you hold the same investment across multiple accounts, enter them all; where applicable, the software can file a single form or run a single calculation across every account.
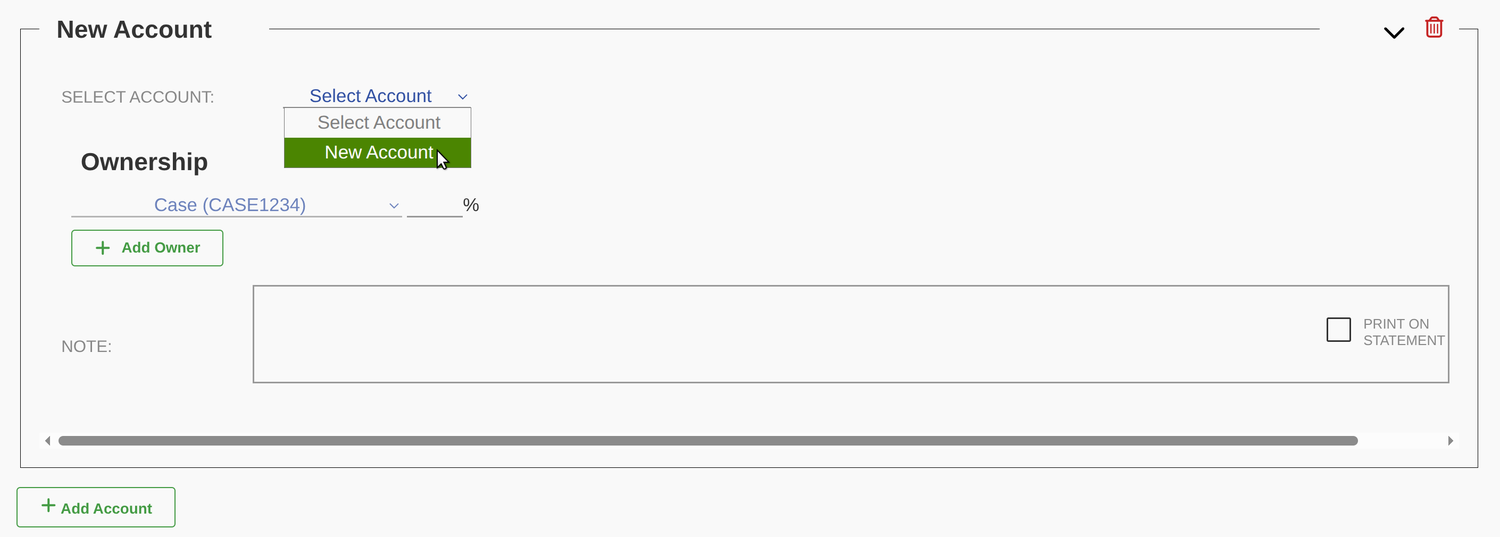
If you’ve already entered accounts, pick one from the drop-down. Otherwise, add a new account.
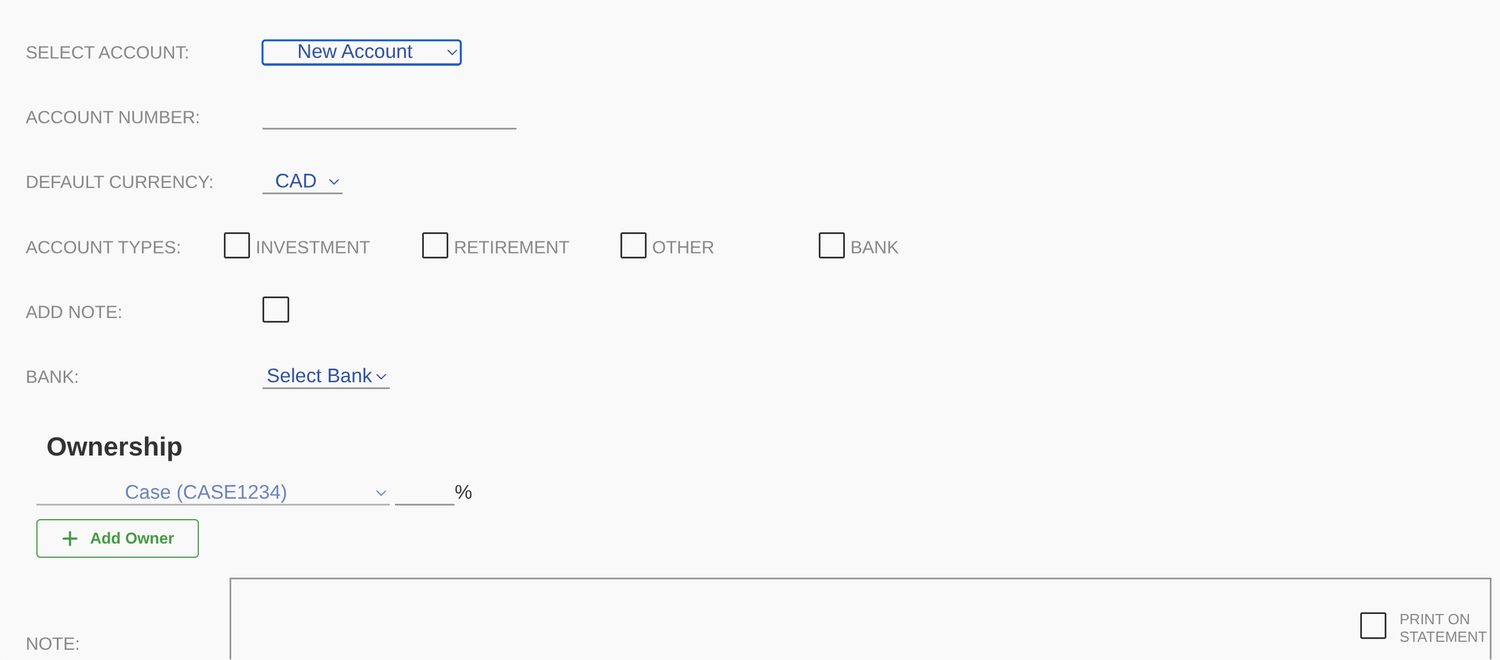
Provide the account number and base currency, then choose the account type:
- Investment account
- Retirement account (RRSP, IRA, etc.)
- Tax-free account (TFSA)
- Bank account (checking, credit)
- Other
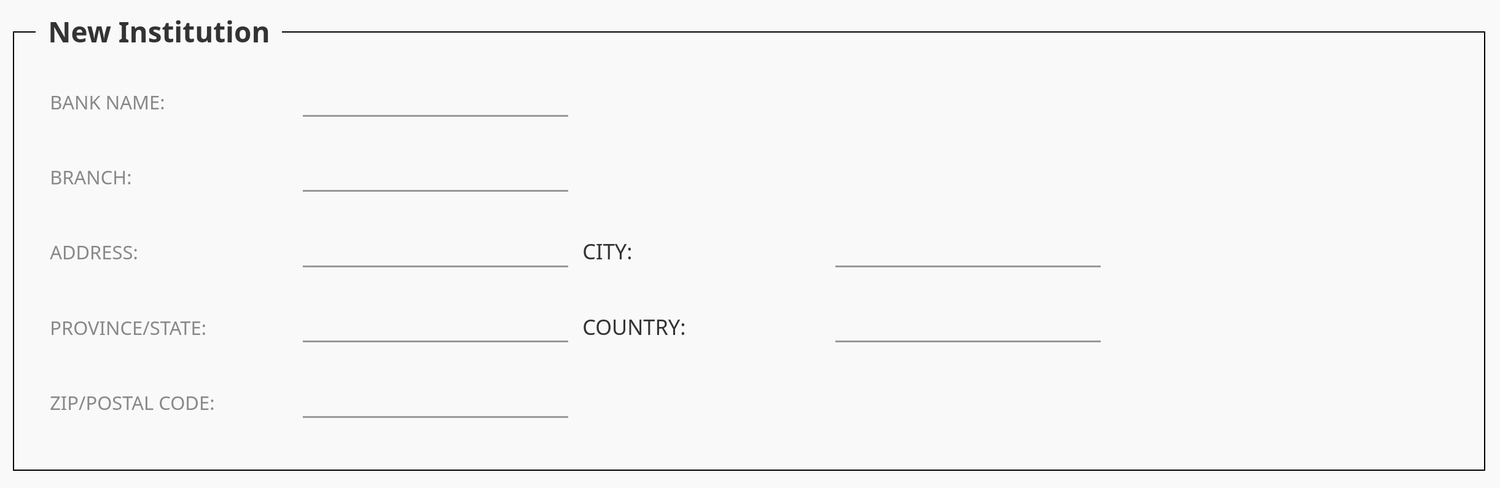
To set the institution, select an existing bank from the drop-down, or choose Add New to create one.

On the New Institution form, the Bank name and Country are mandatory; the remaining fields are optional.
Set the ownership percentage for the client. If you also prepare calculations for the same investment on behalf of other clients, select them from the drop-down and click Add Owner.
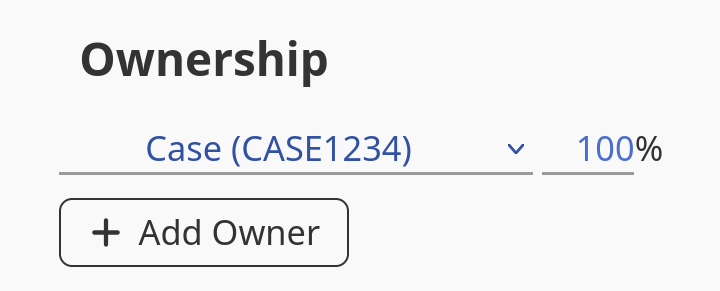
Ownership does not have to add up to exactly 100%, but the total across all owners must not exceed 100%.
Enter any notes in the text field. To include them on the report or statement, tick Print on statement.
962 Election Assistant
Prepare the §962 election and generate the statement with Forms 1118, 8992, and 8993.
With your client and investments in place, you’re ready to prepare the §962 election. From a selected client account, the workflow runs from a new election through to a finished PDF statement containing Forms 1118, 8992, and 8993.
From the left-hand menu, choose New Election under the 962 Election section.
The election screen is organised into sections that you work through from top to bottom.
Section 1 — Election details
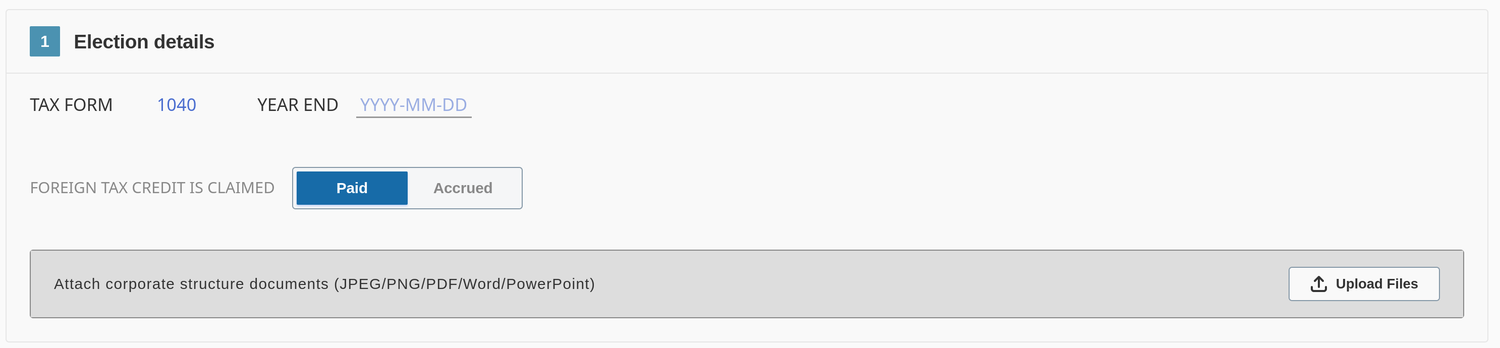
Enter the tax year end and select the tax form (1040). Choose whether foreign taxes are calculated on a Paid or Accrued basis.
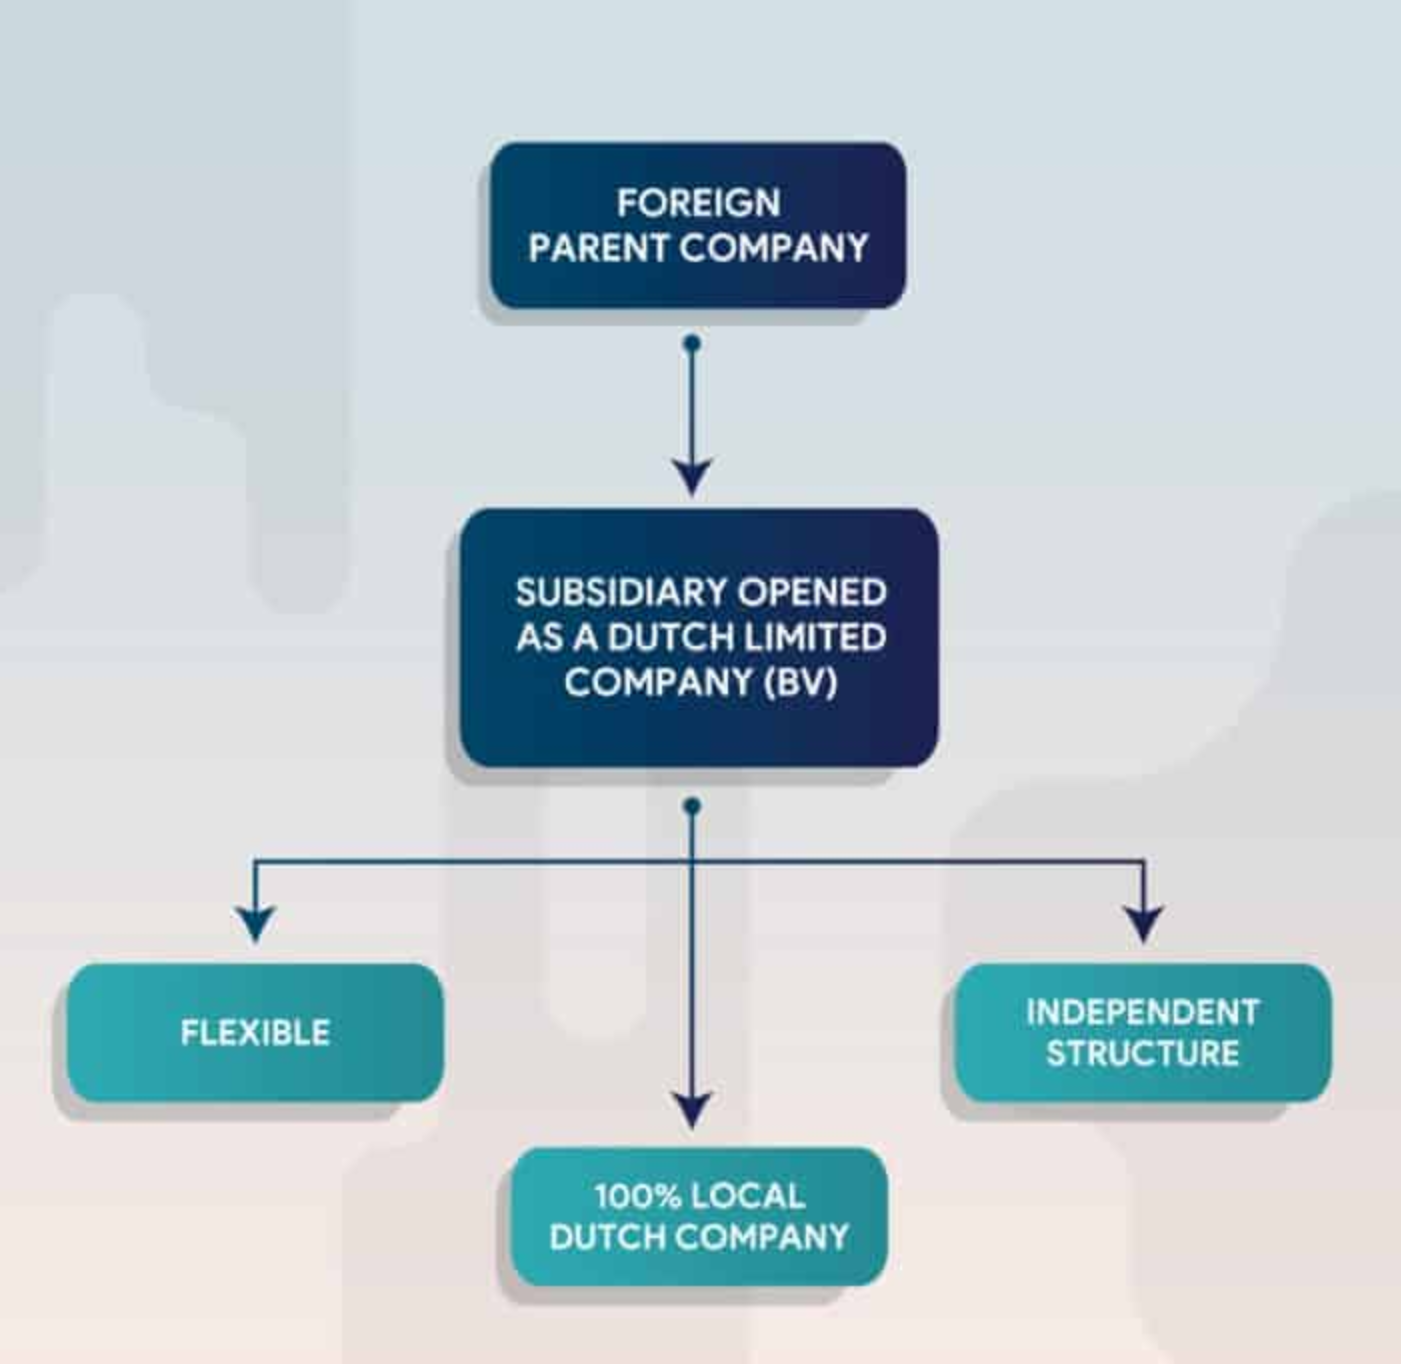
If you’d like the corporate structure included with the election statement, attach it here. This step is optional but recommended when the structure helps clarify ownership. You can upload JPEG, PNG, PDF, Word, or PowerPoint files.

You may attach multiple files in any combination of the supported formats. The maximum size is 16 MB per file, and the total of all files cannot exceed 160 MB.
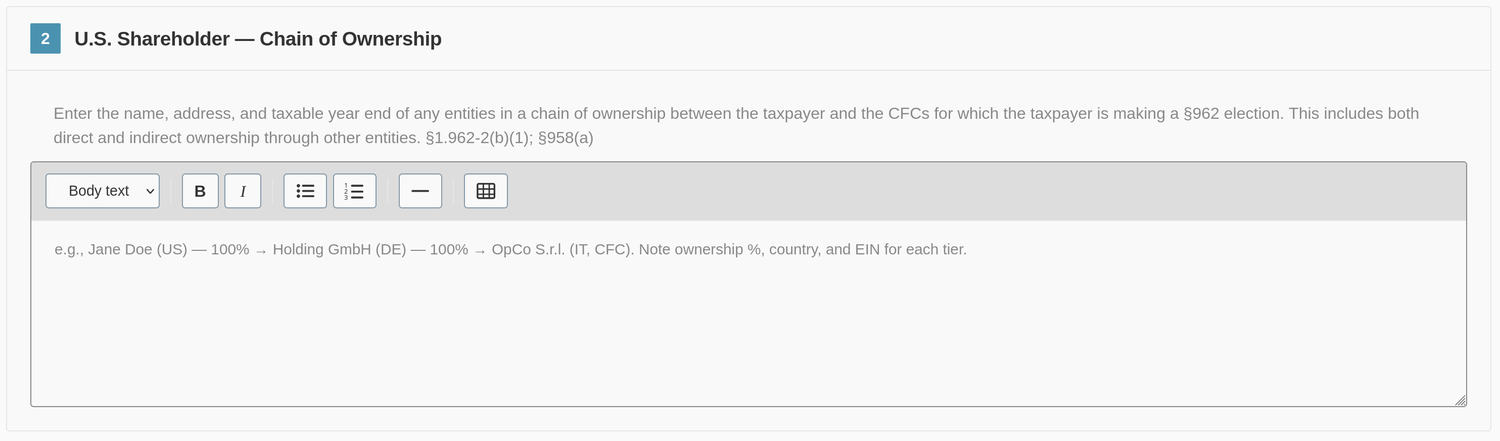
Section 2 — U.S. shareholder · chain of ownership
Enter the name, address, and taxable year end of any entities in the chain of ownership between the taxpayer and the CFCs for which the taxpayer is making a §962 election. This includes both direct and indirect ownership through other entities. (§1.962-2(b)(1); §958(a).)
Section 3 — Corporations to be included
This section lists every corporation that will appear on the election. It populates automatically from the investments you added in the Investments menu.
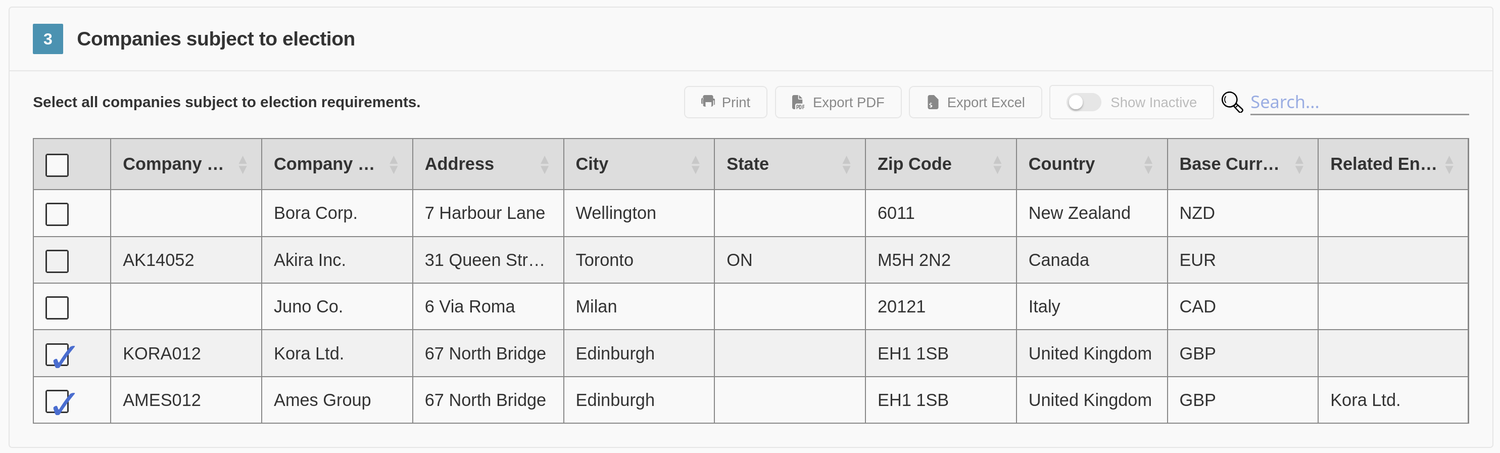
You must include all CFCs you held during the tax year — the §962 election applies to your CFC income inclusions as a group.
Section 4 — Financial data
Enter the income information for every corporation included in the election.
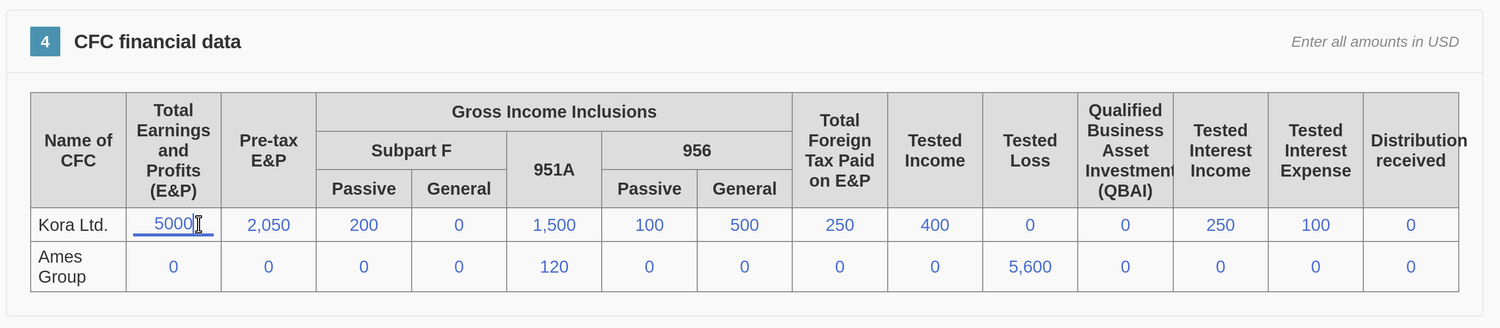
To break earnings and profits down in detail, add multiple lines — one for each earnings type, or to capture multi-year history.
You can save your progress as a Draft at any point, or proceed to Calculate once your entries are complete.

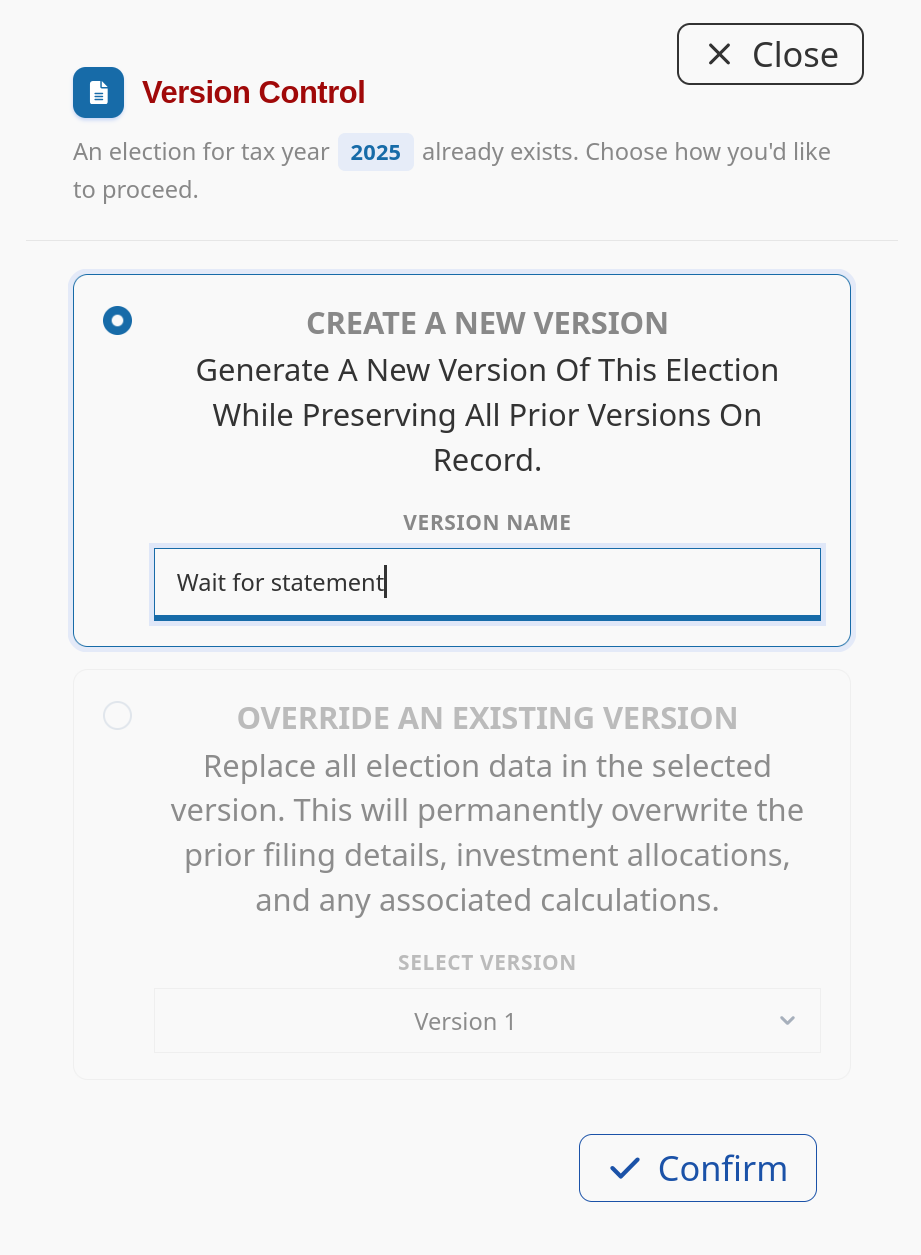
If an election statement already exists for that client and tax year, you’ll be asked whether to create a new version or override an existing one.
The program then returns to the elections screen, where the new version is listed.
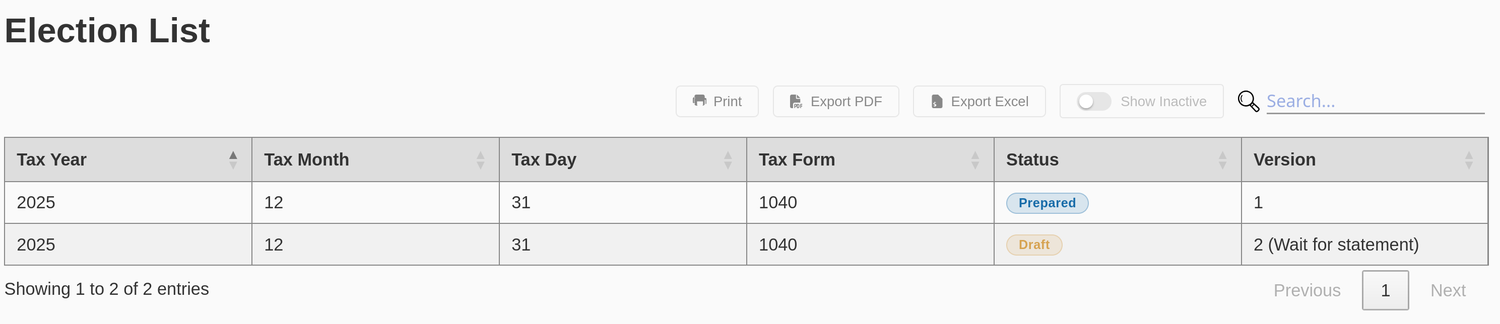
Each version carries a status:
- Draft — a work in progress.
- Prepared — the statement has been generated for that version. Use it to mark an election as completed and filed, or add a version note. There can be only one Prepared version at a time.
Hover over the row for the version you want to work with to reveal its actions:

- Edit — change the data you entered.
- Preview — generate a quick preview before marking the version complete.
- Finalize — enter the taxpayer information and prepare a full, downloadable PDF report.
- Delete — remove a version from the list.
Payment
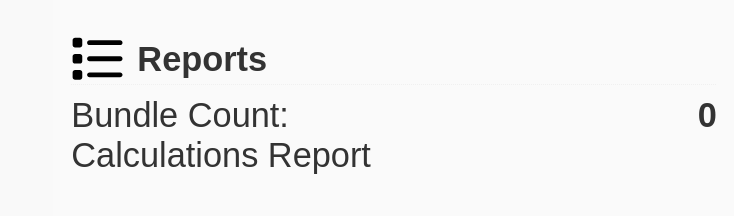
The first time you calculate an election without prepaid forms, you’ll be prompted to pay. A summary of your remaining prepaid calculations is shown in the Reports panel.
An invoice is created for the election version. The cost is $59.95 USD / $85.95 CAD per election version.
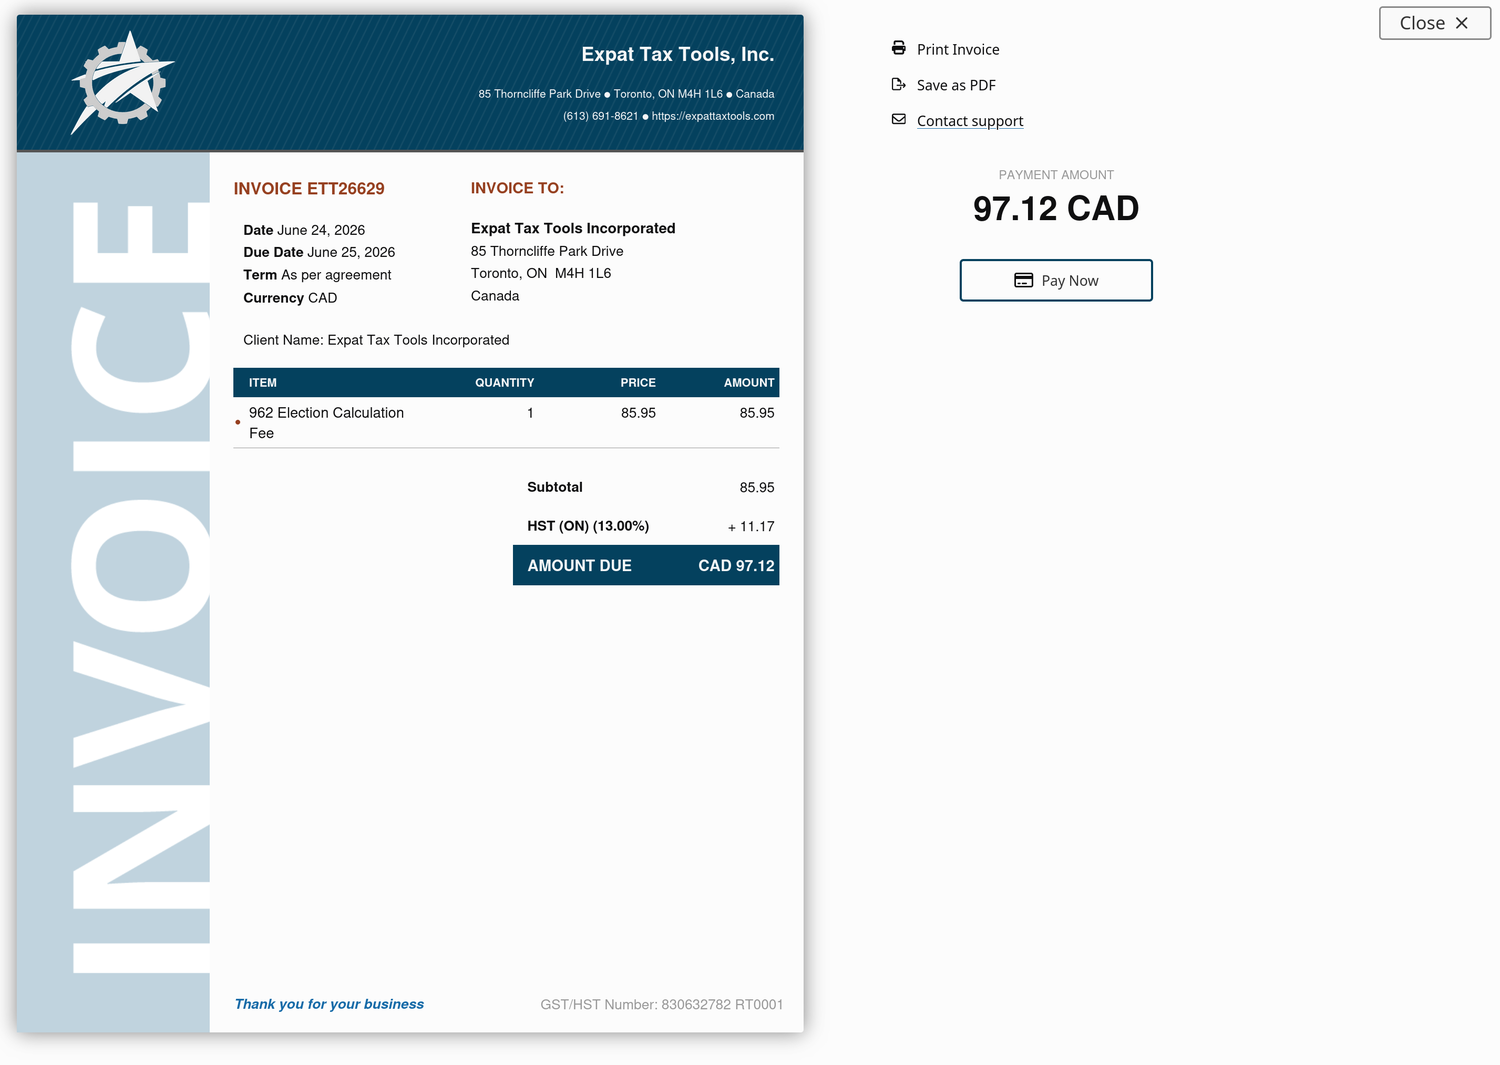
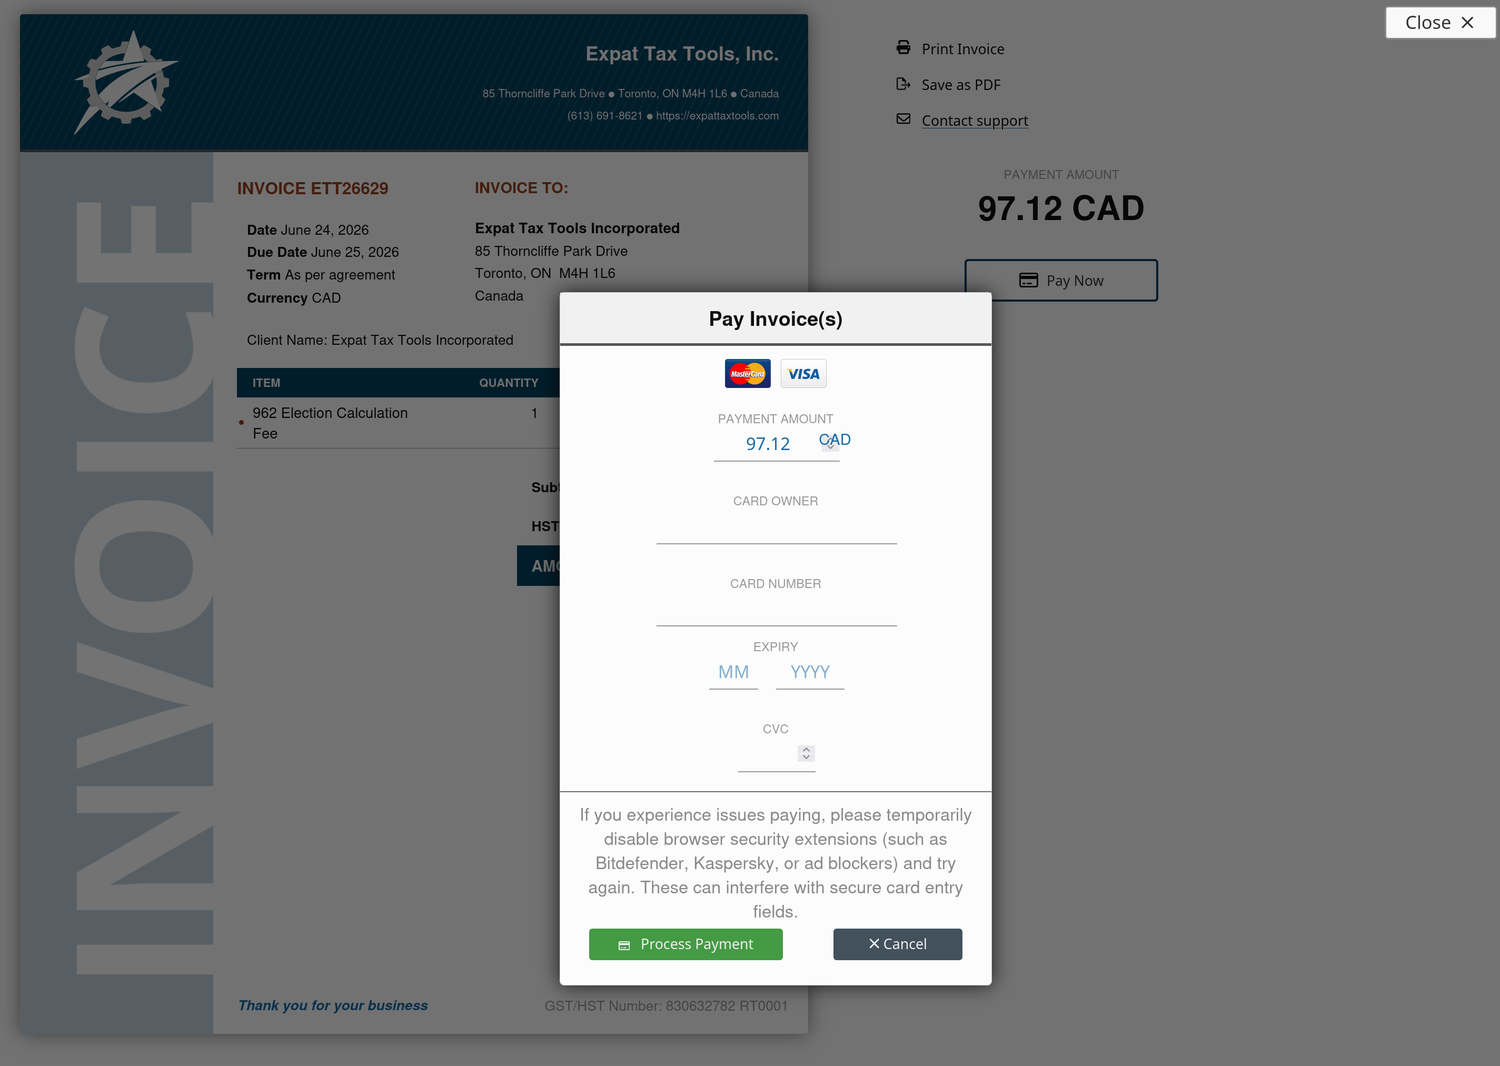
Accepted payment methods:
- Canadian dollars — Visa, Mastercard.
- US dollars — Visa, Mastercard, American Express, and Discover.
Finalize and generate the report
Choose Finalize to enter the taxpayer information used on the report.
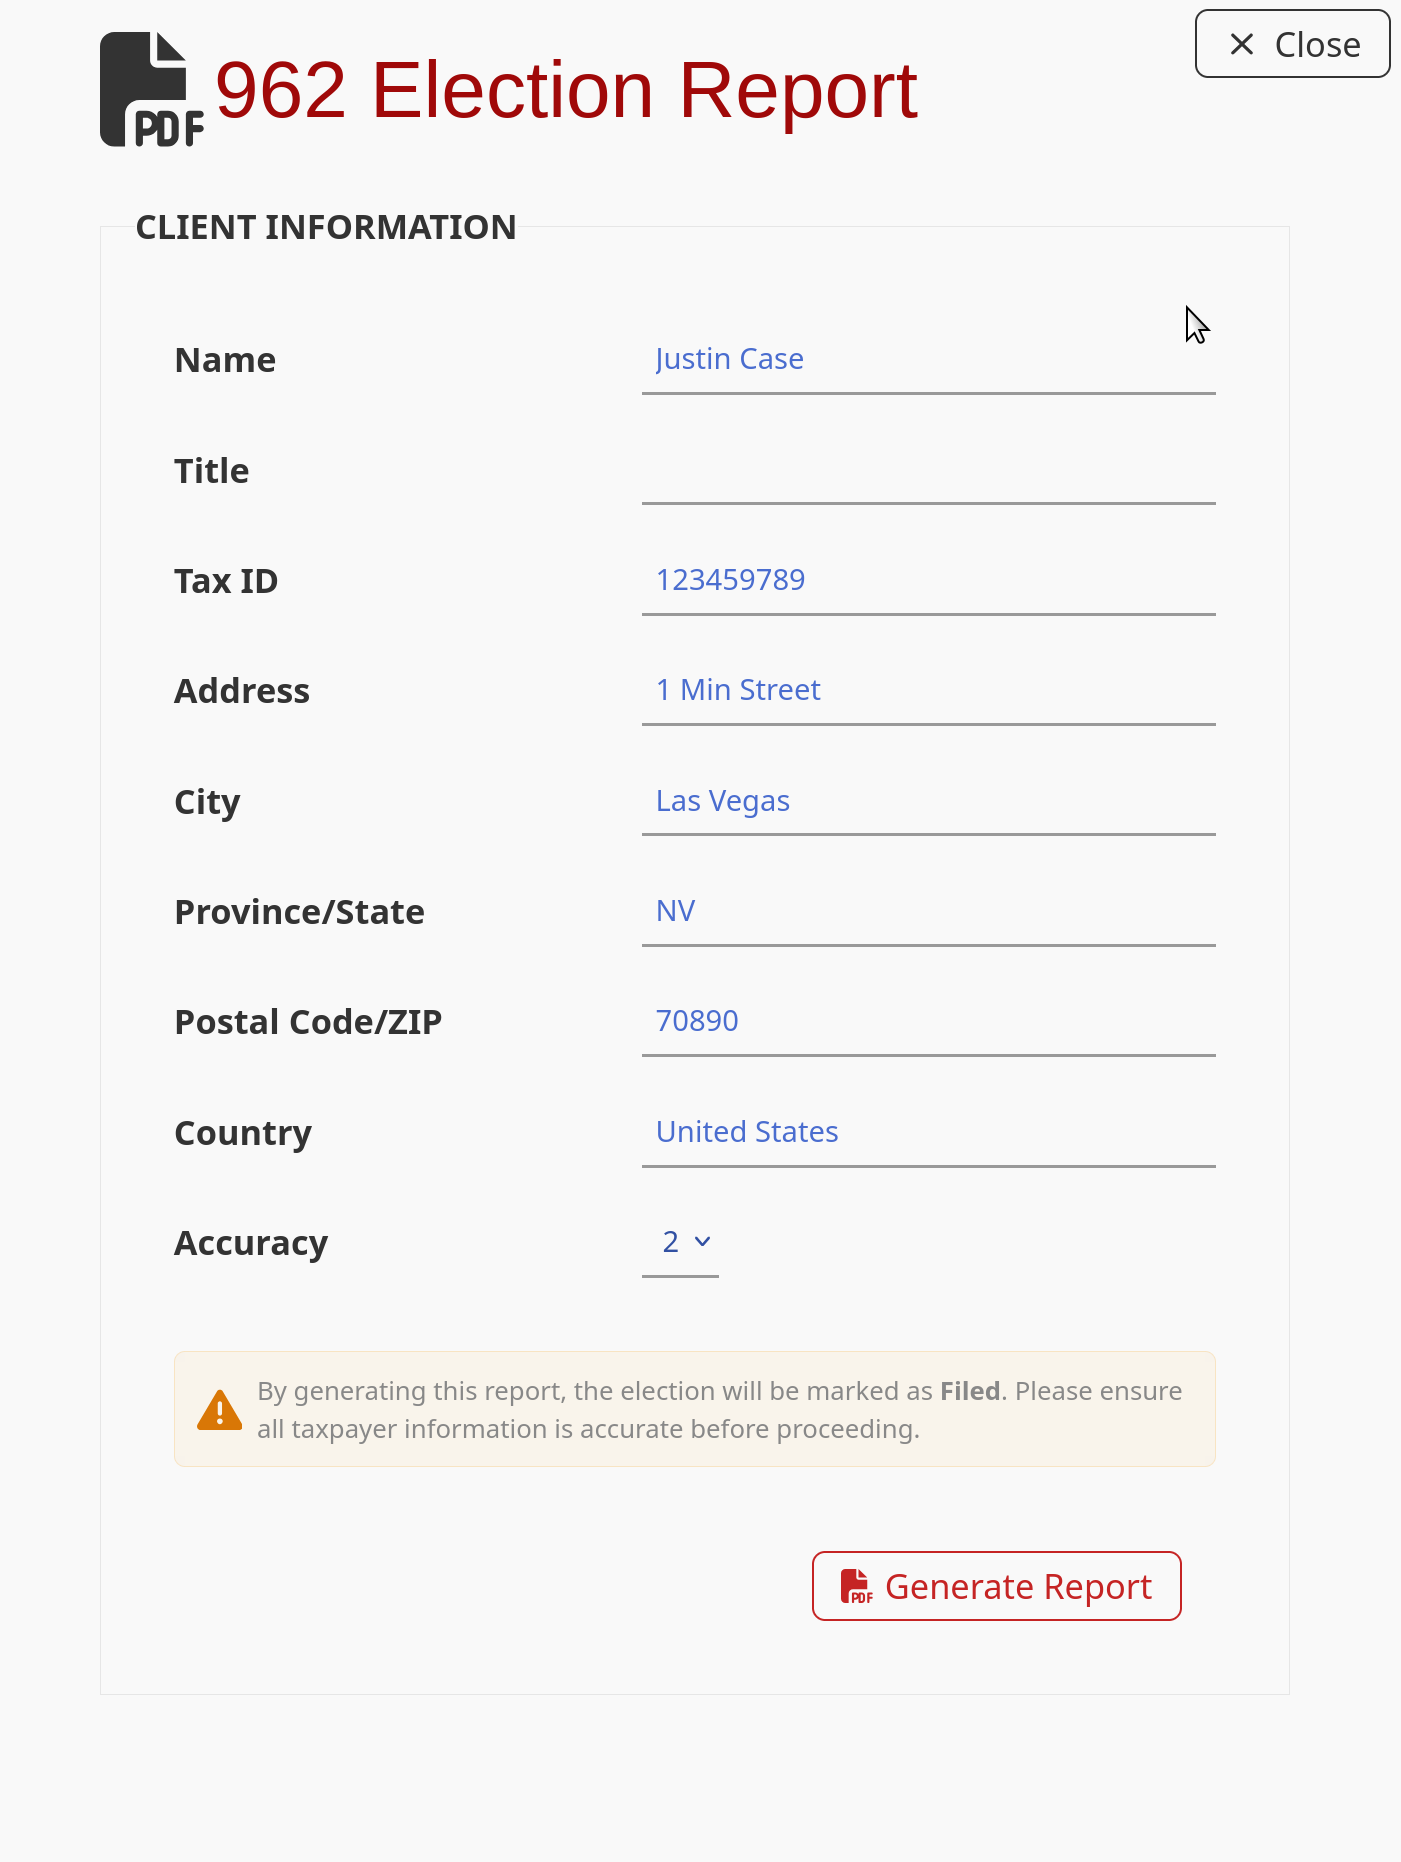
The taxpayer information here is not saved in the system — it is used only to generate the report. If you regenerate the report later, you’ll need to enter it again.
Rounding. Choose your rounding accuracy: 0 digits (whole dollars) or 2 digits (dollars and cents).
Click Generate Report. The system builds a PDF statement containing a completed Form 1118, Form 8992, and Form 8993, showing progress at each step.
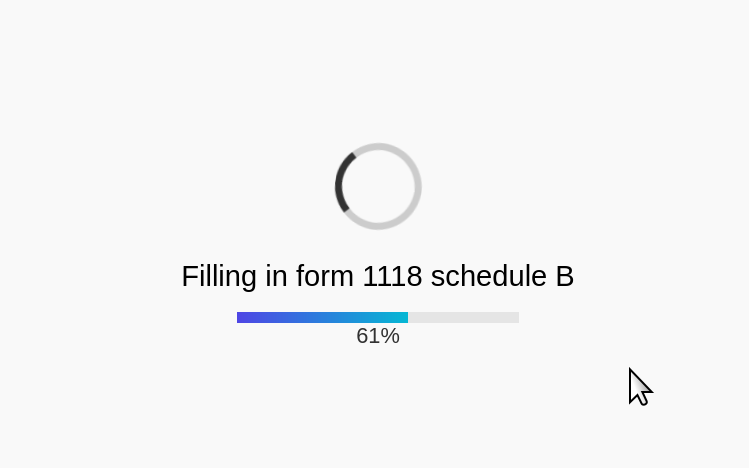
When it’s ready, the report opens in a pop-up window. Review it, then click Download PDF to save a copy.
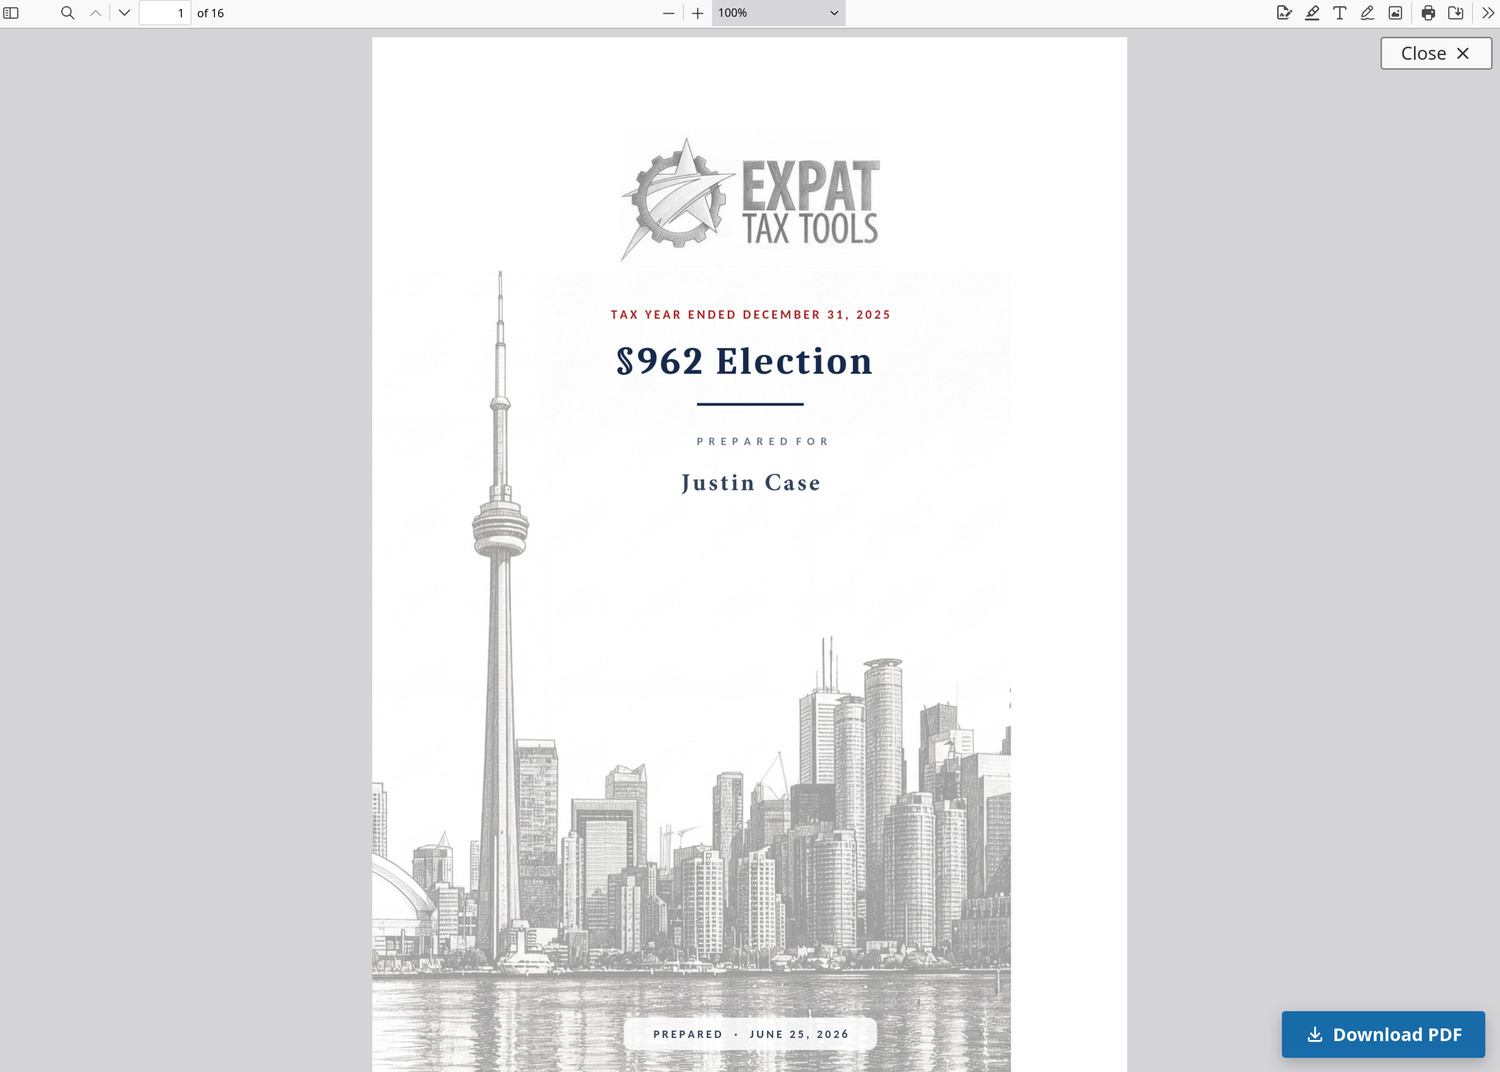
The sample statement
A complete §962 election statement produced by the tool, prepared for a fictional taxpayer.
Sample §962 Election statement
This worked example shows exactly what the 962 Election Assistant generates. It contains:
- §962 Election Statement — the election itself and the information required under Reg. §1.962-2(b).
- Form 1118 — Foreign Tax Credit, prepared separately for the passive, §951A, and general categories.
- Form 8992 and Schedule A — the GILTI calculation.
- Form 8993 — the §250 deduction for FDII and GILTI.
- Organizational chart and a consolidated tax summary.